002 创建 Dashboard 页面
目录
本文对应 Next.js Learn 入门教程的第 4、5 章。
创建 Dashboard
dashboard目录及页面
Next.js 的页面是通过文件系统来组织的。
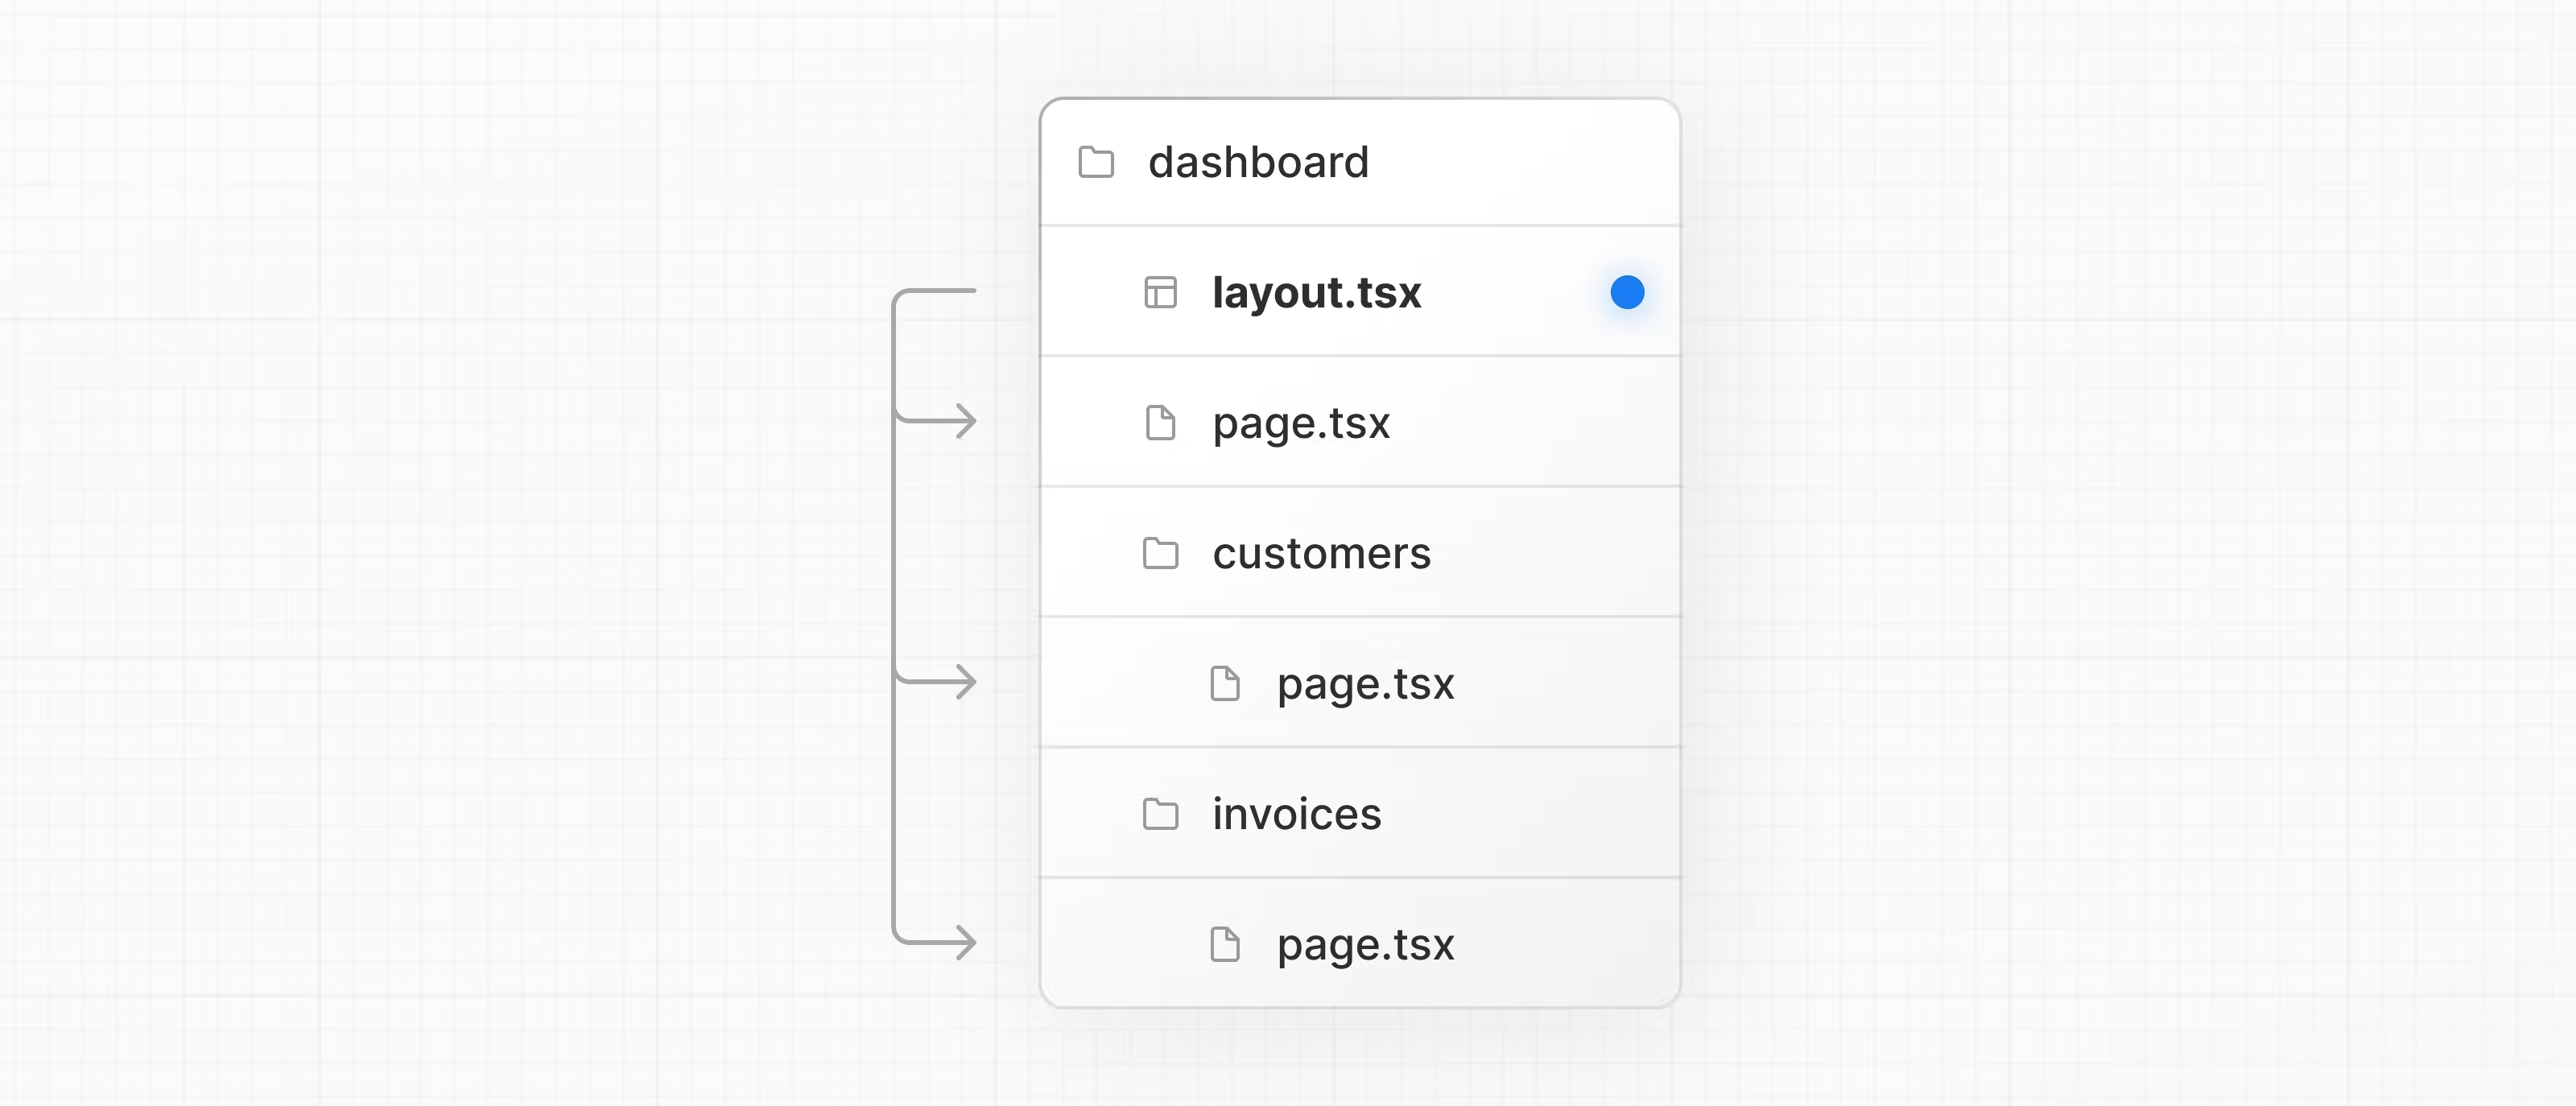
增加如下目录和对应的page.tsx。
    app/dashboard/
    ├── customers
    │   └── page.tsx
    ├── invoices
    │   └── page.tsx
    └── page.tsx
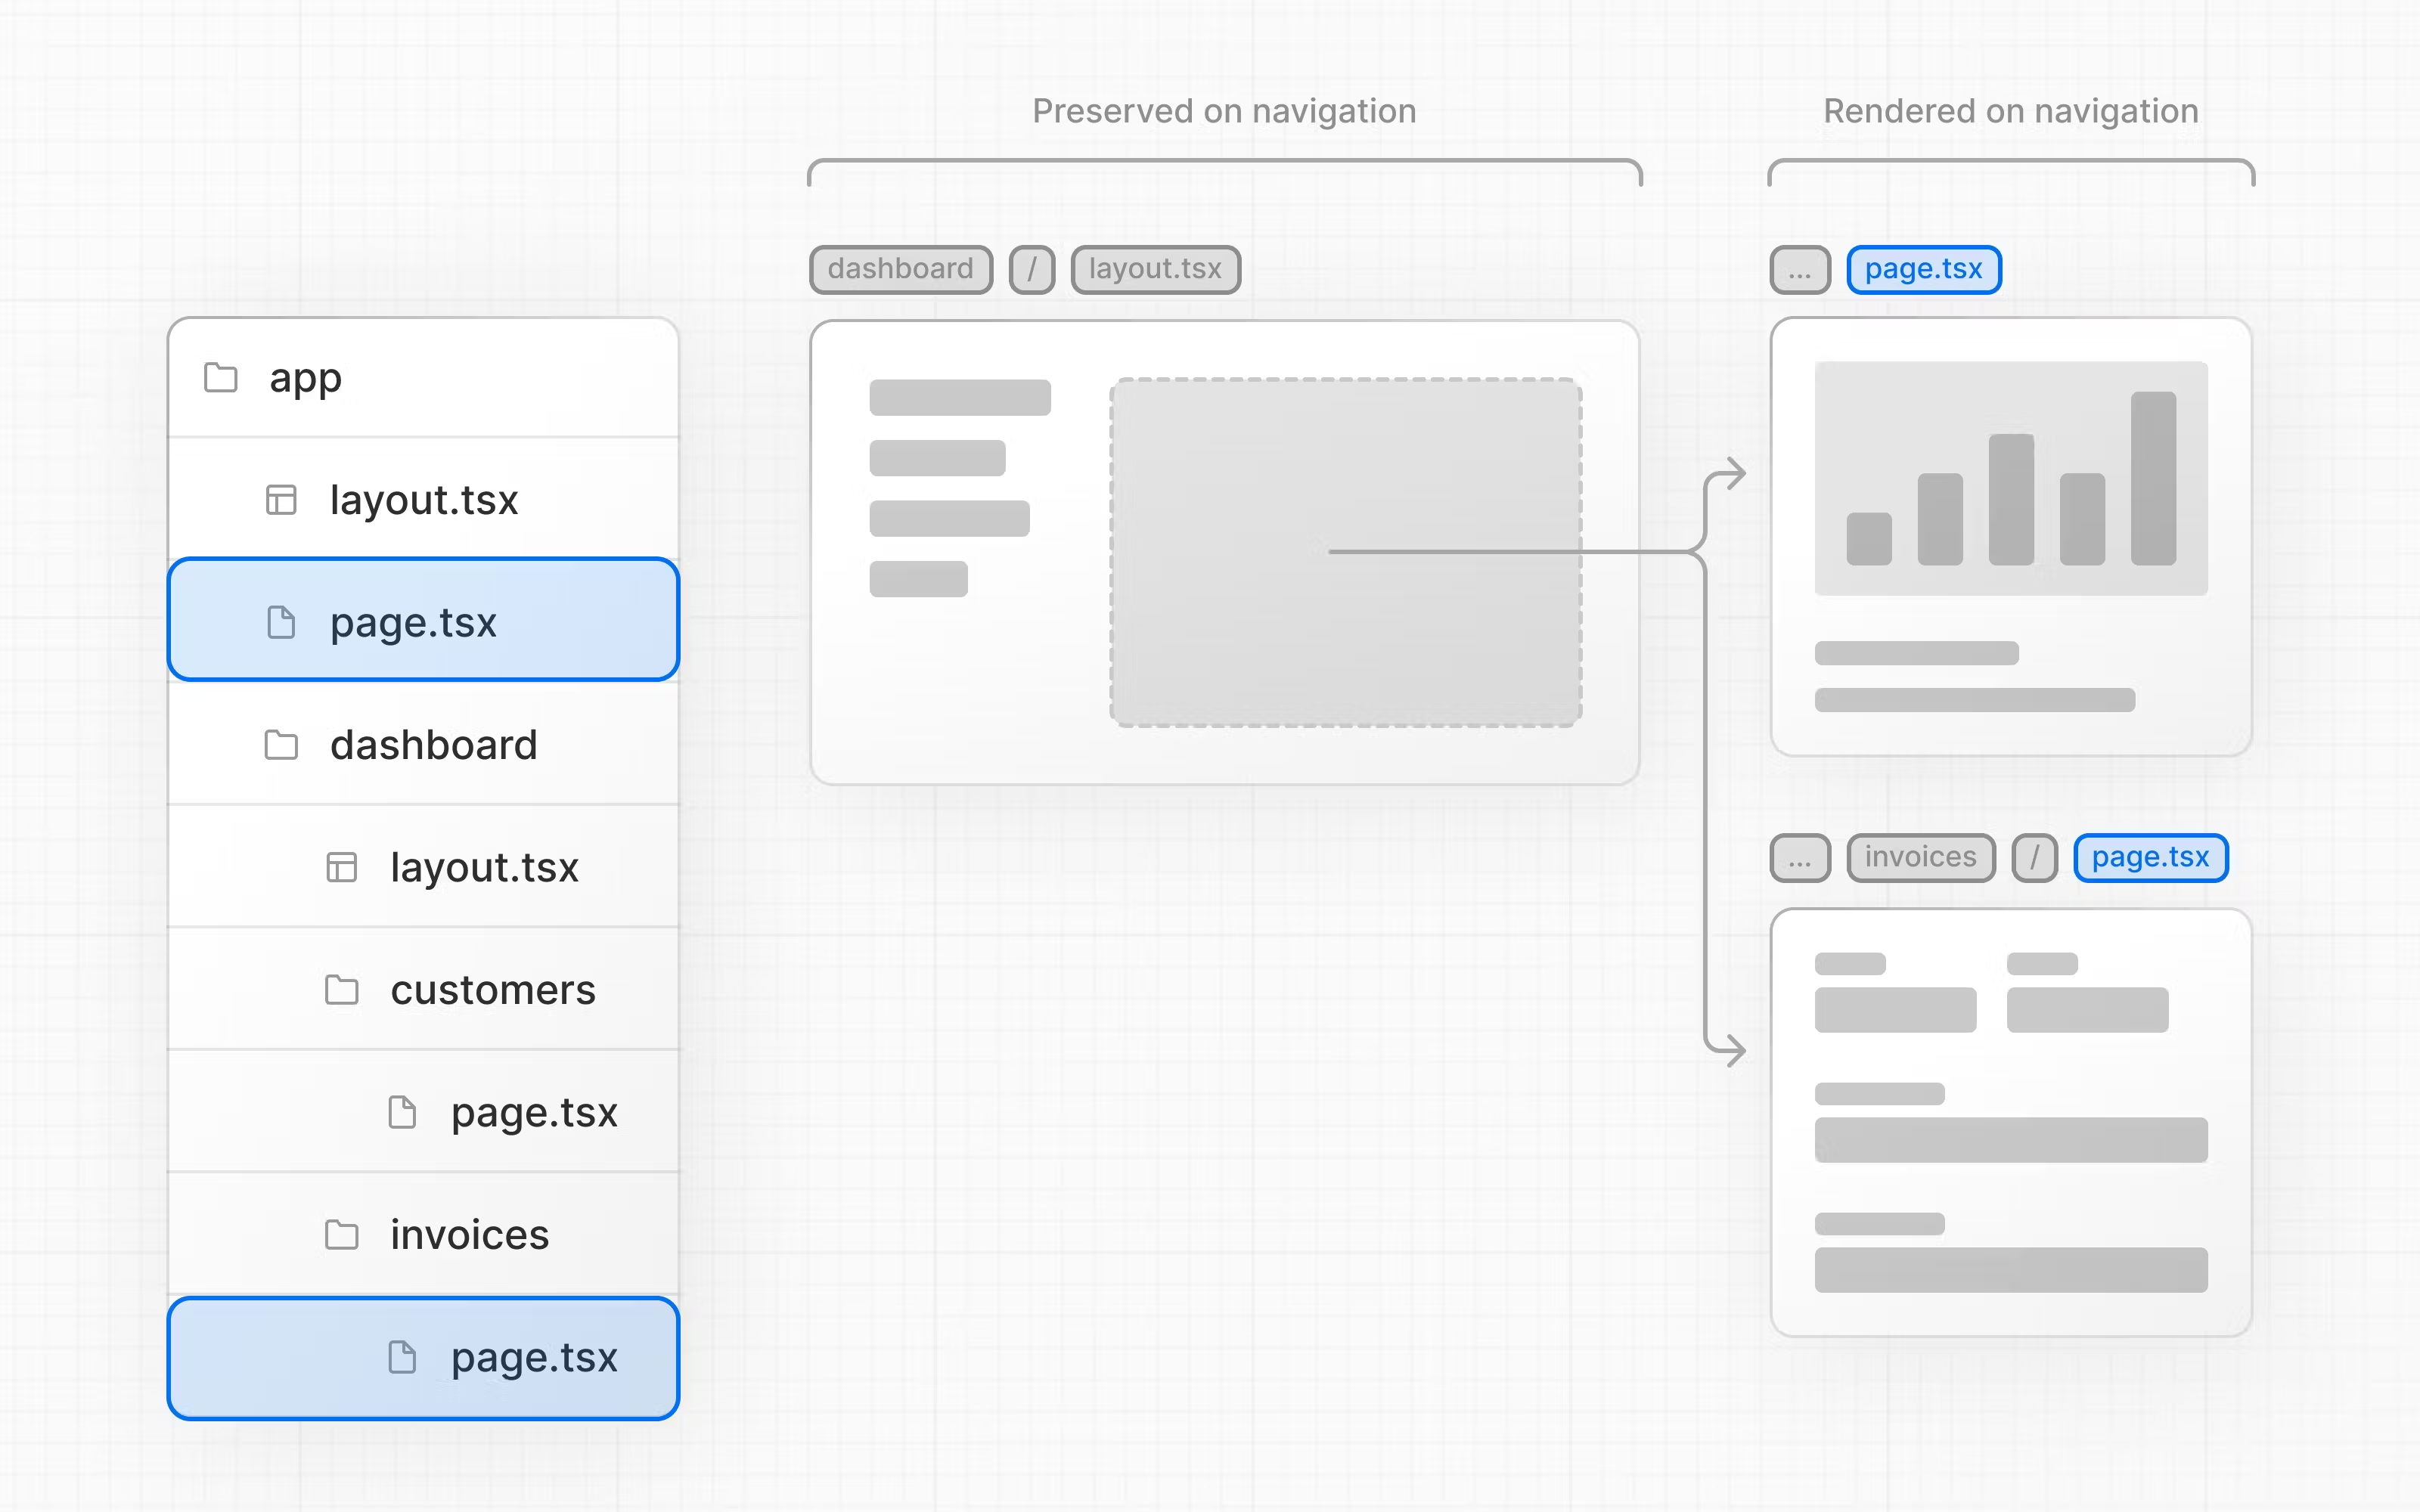
上层统一 layout.tsx
新建文件 /app/dashboard/layout.tsx
tsx
import SideNav from '@/app/ui/dashboard/sidenav';

export default function Layout({ children }: { children: React.ReactNode }) {
  return (
    <div className="flex h-screen flex-col md:flex-row md:overflow-hidden">
      <div className="w-full flex-none md:w-64">
        <SideNav />
      </div>
      <div className="flex-grow p-6 md:overflow-y-auto md:p-12">{children}</div>
    </div>
  );
}

图片来源:https://nextjs.org/learn/dashboard-app/creating-layouts-and-pages
Root layout
https://nextjs.org/learn/dashboard-app/creating-layouts-and-pages#root-layout
https://nextjs.org/docs/app/building-your-application/routing/pages-and-layouts#root-layout-required
页面切换 next/link 和 active links
使用 <Link>
<Link> allows you to do client-side navigation with JavaScript.
Automatic code-splitting and prefetching
how navigation works.
Dashboard 左侧的组件结构是:
    <SideNav />
        <NavLinks />
/app/ui/dashboard/nav-links.tsx
用 <Link ..></Link>替换<a ..></a>
usePathname()
https://nextjs.org/docs/app/api-reference/functions/use-pathname
/app/ui/dashboard/nav-links.tsx
'use client'import { usePathname } from 'next/navigation';const pathname = usePathname();代码
tsx
'use client';

import {
  UserGroupIcon,
  HomeIcon,
  DocumentDuplicateIcon,
} from '@heroicons/react/24/outline';
import Link from 'next/link';
import { usePathname } from 'next/navigation';
import clsx from 'clsx';

// ...

export default function NavLinks() {
  const pathname = usePathname();

  return (
    <>
      {links.map((link) => {
        const LinkIcon = link.icon;
        return (
          <Link
            key={link.name}
            href={link.href}
            className={clsx(
              'flex h-[48px] grow items-center justify-center gap-2 rounded-md bg-gray-50 p-3 text-sm font-medium hover:bg-sky-100 hover:text-blue-600 md:flex-none md:justify-start md:p-2 md:px-3',
              {
                'bg-sky-100 text-blue-600': pathname === link.href,
              },
            )}
          >
            <LinkIcon className="w-6" />
            <p className="hidden md:block">{link.name}</p>
          </Link>
        );
      })}
    </>
  );
}注意这段 links定义:
tsx
// Map of links to display in the side navigation.
// Depending on the size of the application, this would be stored in a database.
const links = [
  {
    name: 'Home',
    href: '/dashboard',
    icon: HomeIcon },
  {
    name: 'Invoices',
    href: '/dashboard/invoices',
    icon: DocumentDuplicateIcon,
  },
  {
    name: 'Customers',
    href: '/dashboard/customers',
    icon: UserGroupIcon
  },
];