快速启动:使用 AI SDK 的三种方式
目录
1. 准备工作:创建项目、设置
1.1 创建一个 Next.js 项目
我们将创建一个采用 APP 路由(app route)的 Next.js 新项目,其中采用 tailwind css。
bash
npx create-next-app@canary aiapp创建 Next.js 项目时的相关选项
✔ Would you like to use TypeScript? … No / Yes
✔ Would you like to use ESLint? … No / Yes
✔ Would you like to use Tailwind CSS? … No / Yes
✔ Would you like to use `src/` directory? … No / Yes
✔ Would you like to use App Router? (recommended) … No / Yes
✔ Would you like to customize the default import alias (@/*)? … No / Yes
✔ What import alias would you like configured? … @/*
Initializing project with template: app-tw
进行一些必要的清理: global.css 去掉渐变
1.2 安装必要的依赖库
我们将使用 Vercel AI SDK,并直接使用 OpenAI JS SDK 连接 OpenAI 公司的相关模型。运行如下命令安装:
bash
npm install ai @ai-sdk/openai zod其中包括:
- ai
- @ai-sdk/openai
- zod
目前看,似乎没有使用 openai sdk!
点开查看 package.json 中的版本信息
json
"dependencies": {
  "@ai-sdk/openai": "^0.0.9",
  "ai": "^3.1.1",
  "next": "14.3.0-canary.39",
  "react": "^18",
  "react-dom": "^18",
  "zod": "^3.23.6"
},1.3 设置 OpenAI API Key
我们将使用 OpenAI 公司的相关模型,请获取 OpenAI API Key,并在文件 .env.local 中设置:
OPENAI_API_KEY=xxxxxxxxxAI SDK 将直接从 .env.local 中读取。
2. 方式一:使用 API 与 ai/react
使用这种方式时,AI SDK 是一个中间模块,它在页面前端接受用户的输入,然后将 AI 的输出以 Steaming 形式再输出到前端。
具体做法是:它将用户的调用转向 /api/chat/,我们将在这里进行模型的调用。
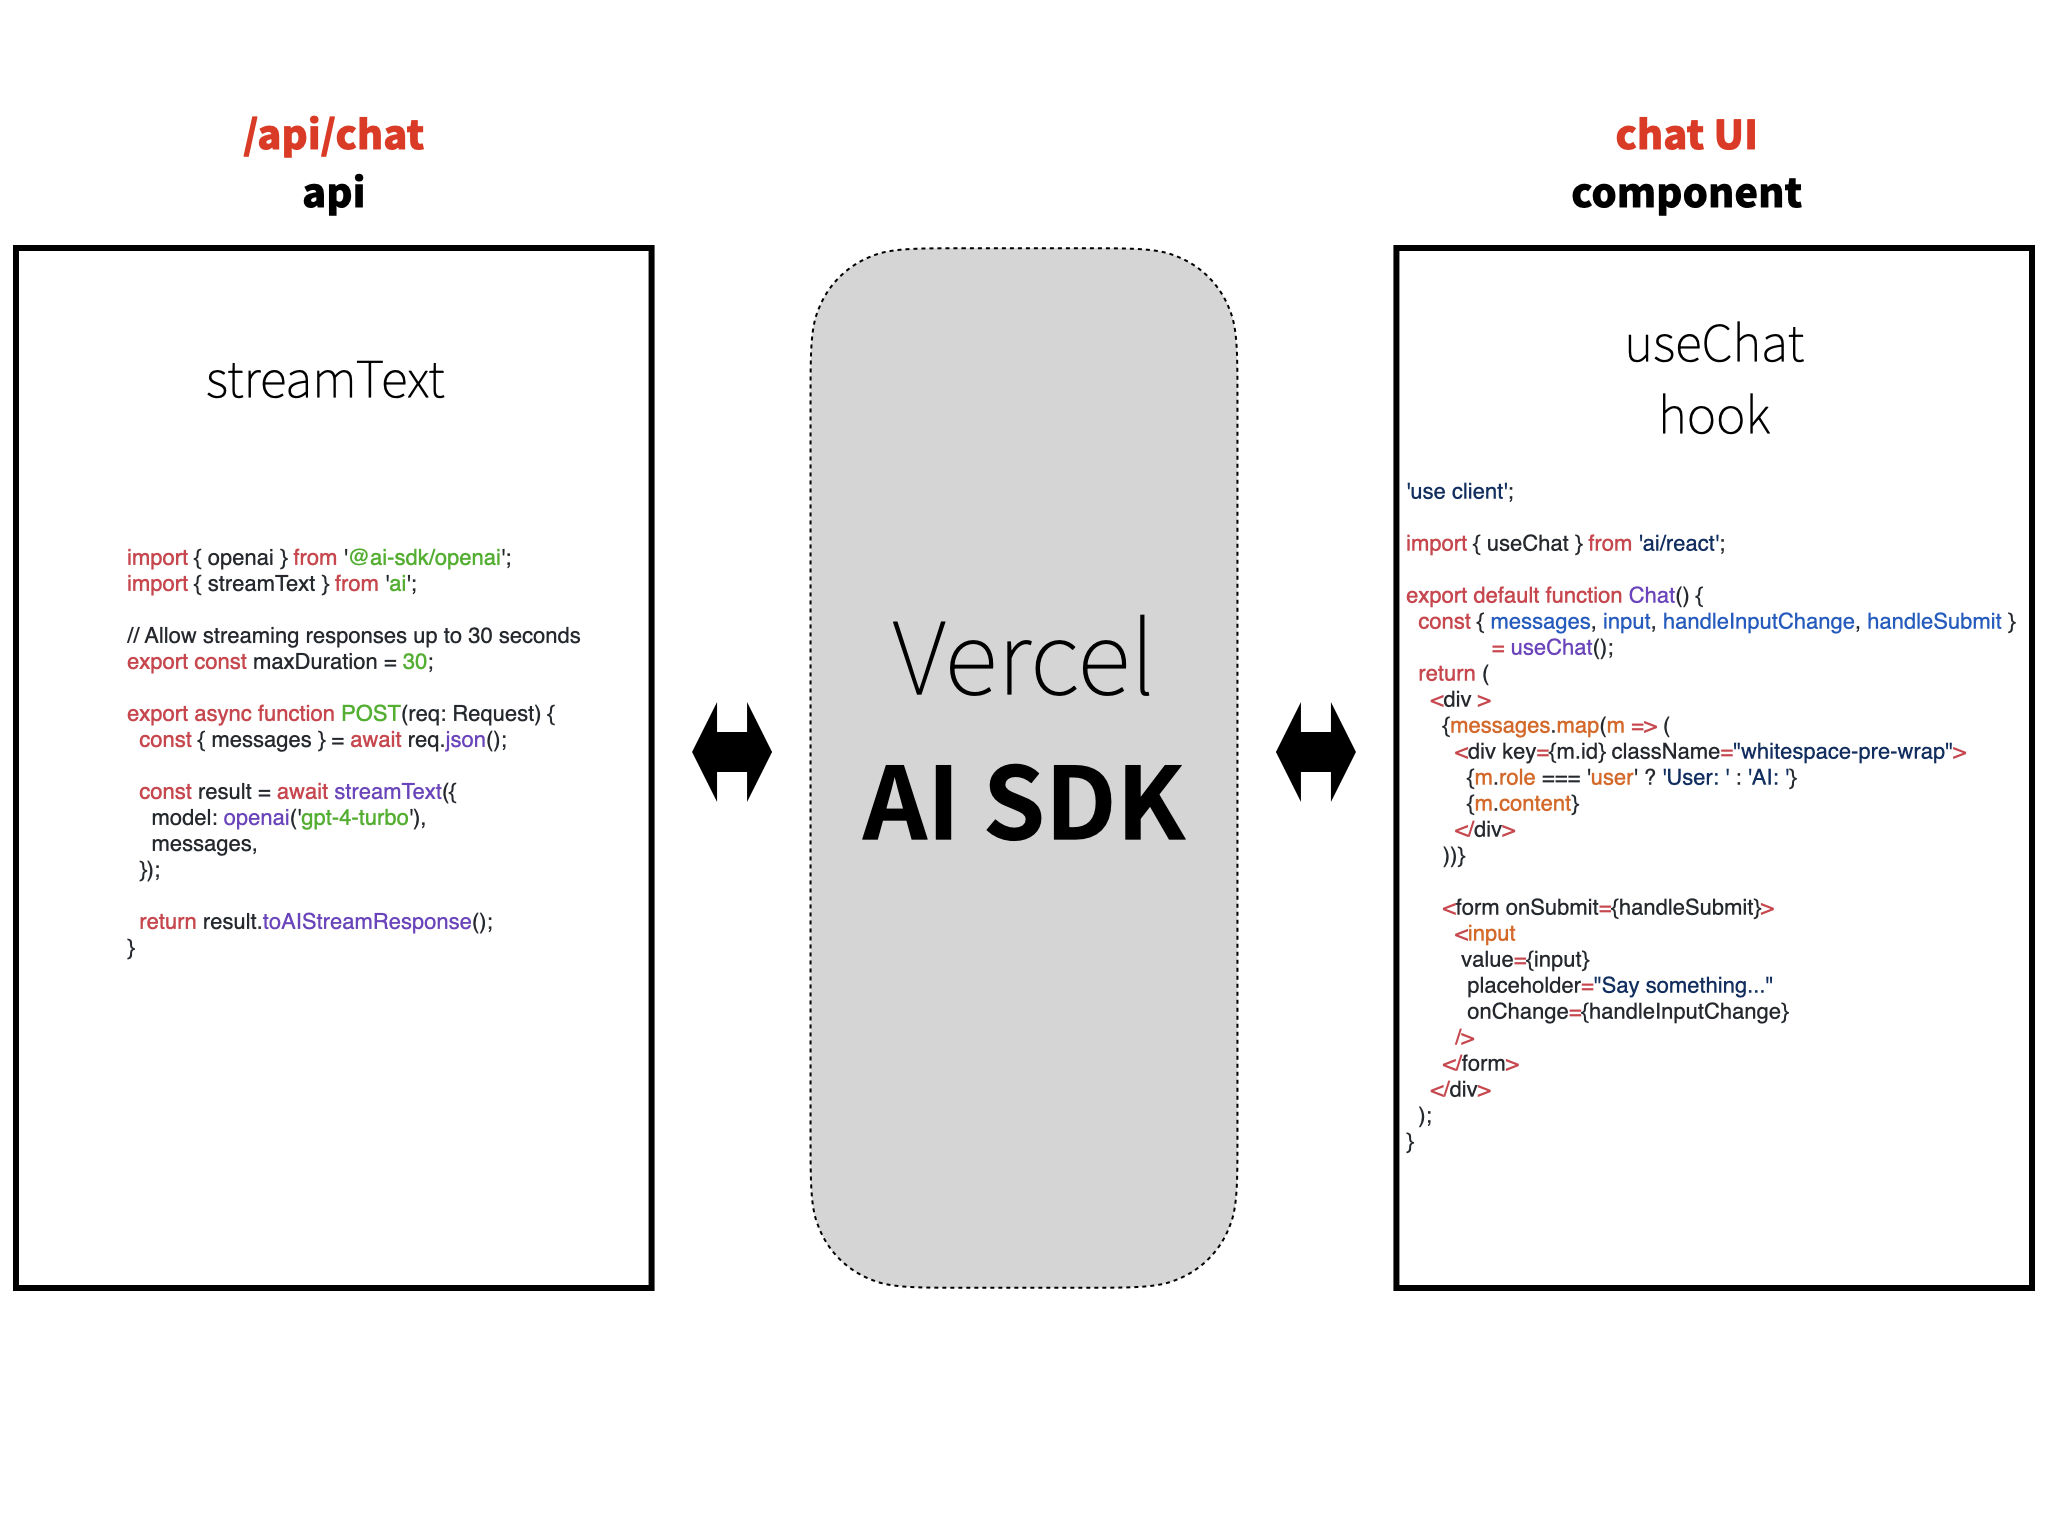
2.1 编写 API 路由
新建 app/api/chat 目录,并创建 route.ts文件。在其中,我们调用模型,并将模型的输出转换为 OpenAIStream,然后用 StreamingTextResponse 返回。
/app/api/chat/route.ts
tsx
import { openai } from '@ai-sdk/openai'
import { StreamingTextResponse, streamText } from 'ai'

// Set the runtime to edge for best performance
// export const runtime = 'edge';

export async function POST(req: Request) {
  const { messages } = await req.json()

  const result = await streamText({
    model: openai('gpt-4-turbo'),
    messages
  })

  return new StreamingTextResponse(result.toAIStream())
}变化细节
变化:
- 使用 openai provider,而不是直接使用 OpenAI SDK。
- 如果要自定义,需要对 provider 定义。
- 使用
streamText, 而不是原来直接使用:await openai.chat.completions.create() - 使用
result.toAIStream(),而不是const stream = OpenAIStream(response);
https://sdk.vercel.ai/docs/troubleshooting/migration-guide
如果仅是返回文本,也可写成:
return result.toAIStreamResponse();问题:如果不是 stream ,如何做? - generateText
之前版本
tsx
import OpenAI from 'openai';
import { OpenAIStream, StreamingTextResponse } from 'ai';

// Create an OpenAI API client (that's edge friendly!)
const openai = new OpenAI({
  apiKey: process.env.OPENAI_API_KEY,
});

// Set the runtime to edge for best performance
export const runtime = 'edge';

export async function POST(req: Request) {
  const { messages } = await req.json();

  // Ask OpenAI for a streaming chat completion given the prompt
  const response = await openai.chat.completions.create({
    model: 'gpt-3.5-turbo',
    stream: true,
    messages,
  });

  // Convert the response into a friendly text-stream
  const stream = OpenAIStream(response);
  // Respond with the stream
  return new StreamingTextResponse(stream);
}在上述代码中, 调用 OpenAI sdk 中的 openai.chat.completions.create 方法,从OpenAI API获取流式响应。
然后,我们将模型的响应传给 Vercel AI SDK 的 OpenAIStream。我们再使用 StreamingTextResponse 来设置适当的 headers 和其他 Response 细节,以流式将 Response 传输回客户端。
2.2 编写 Chat 界面组件
(与之前相比不变)
为了在页面前端显示对话,我们创建 Chat 界面组件。它包括对话信息的显示、用户的提问输入框。
在这里,我们使用的是 useChat 这个 Hook,文档参见:链接。使用它,我们可以在界面组件中获得状态变量与帮助函数,如:
messages,对话消息,一个包含id、role和content属性的对象数组。input,这是用户输入字段的当前值。isLoading,表示 API 请求是否正在进行中。handleInputChange,handleSubmit,处理输入和提交的帮助函数。
新建文件 /components/chat.tsx 如下:
tsx
'use client';

import { useChat } from 'ai/react';

export default function Chat() {
  const { messages, input, handleInputChange, handleSubmit } = useChat();
  return (
    <div className="flex flex-col w-full max-w-md py-24 mx-auto stretch">
      {messages.map(m => (
        <div key={m.id} className="whitespace-pre-wrap">
          {m.role === 'user' ? 'User: ' : 'AI: '}
          {m.content}
        </div>
      ))}

      <form onSubmit={handleSubmit}>
        <input
          className="fixed bottom-0 w-full max-w-md p-2 mb-8 border border-gray-300 rounded shadow-xl"
          value={input}
          placeholder="Say something..."
          onChange={handleInputChange}
        />
      </form>
    </div>
  );
}2.3 在页面显示 Chat 组件
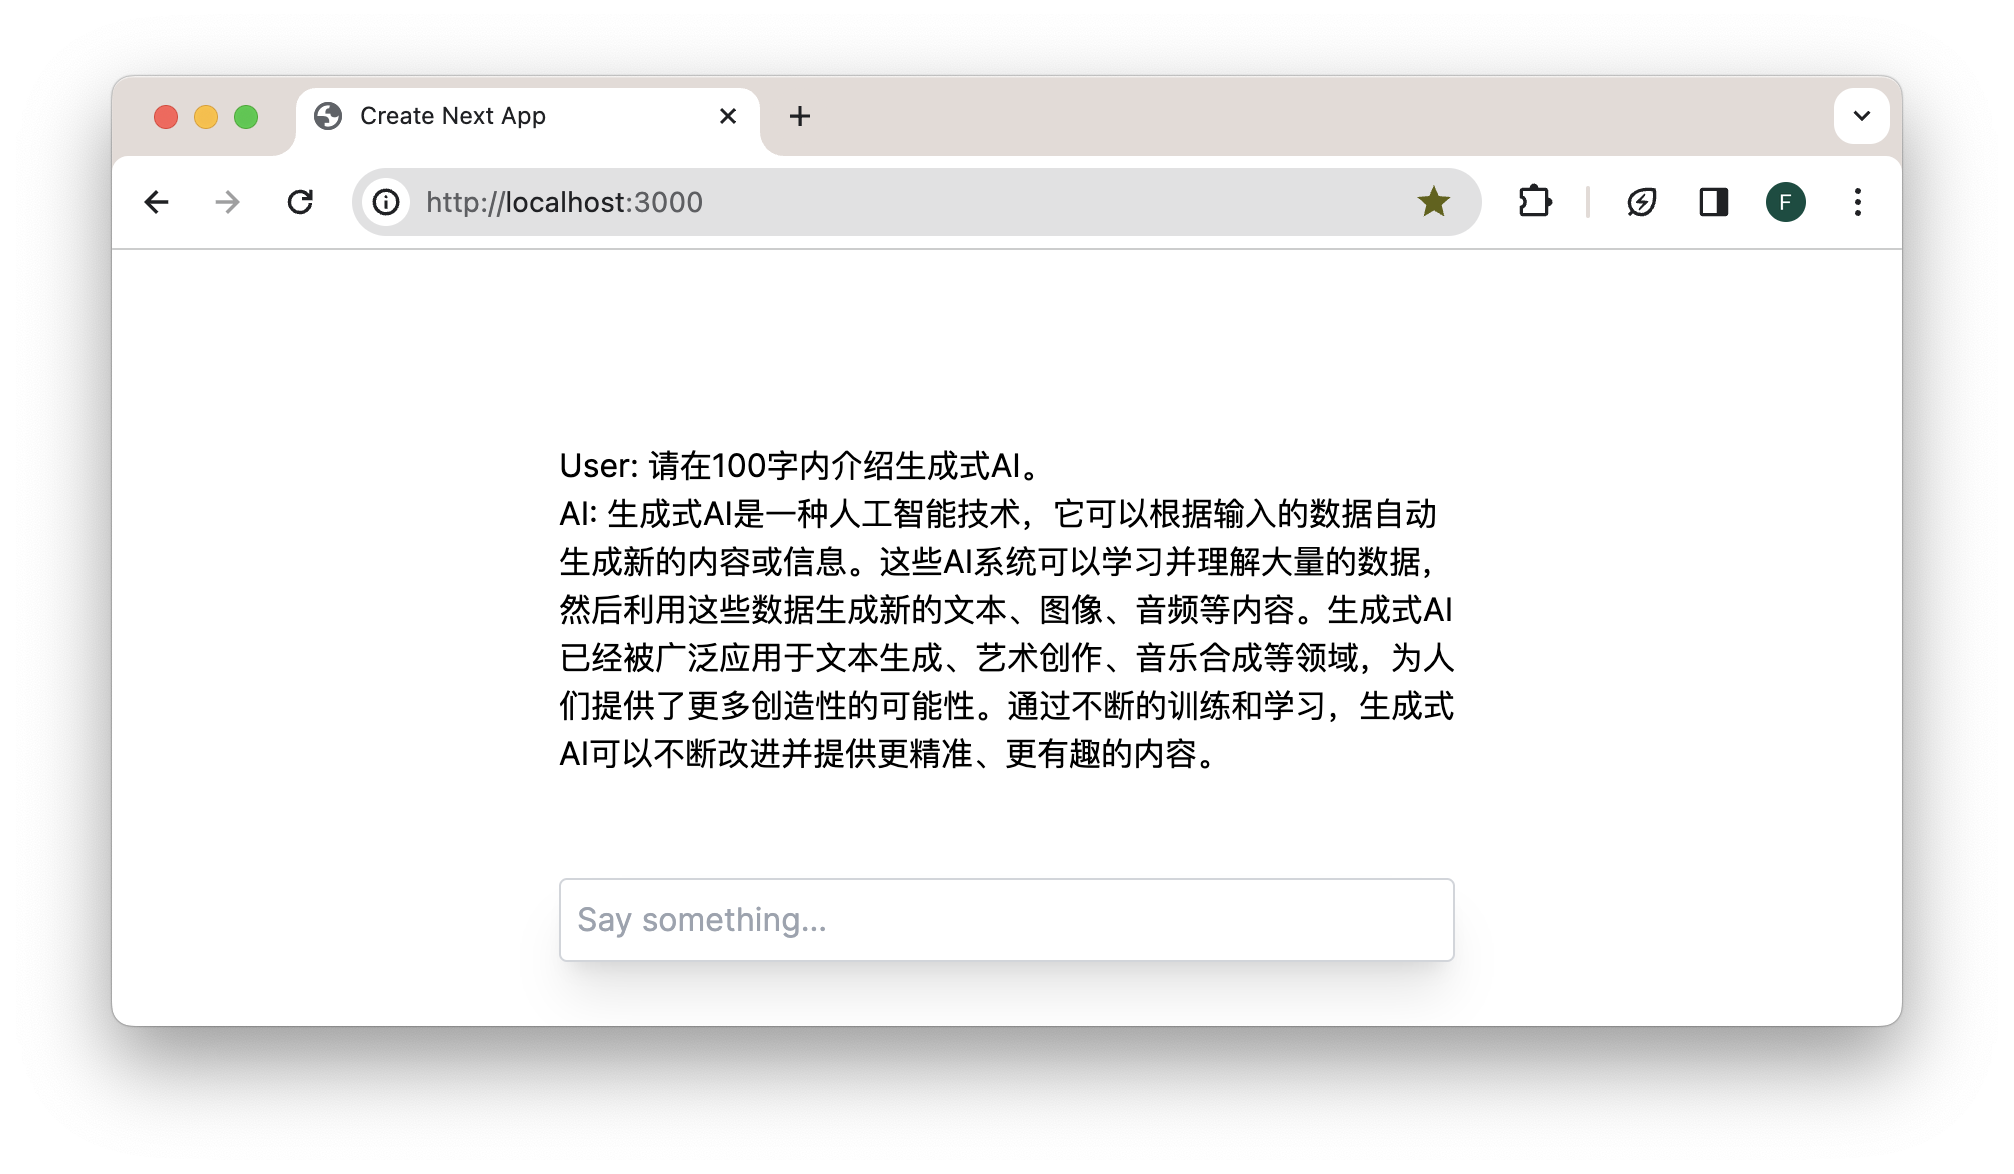
最后,我们在首页显示这个 Chat 界面组件。代码如下:
app/page.tsx
tsx
import  Chat  from '@/components/chat';

export const runtime = 'edge';
export default function Page() {
  return <Chat />;
}运行后的界面如下,上方是对话历史,页面底端是用户的对话输入框。
3. 文本之外同步返回数据
Stream Data Alongside Response
https://sdk.vercel.ai/docs/getting-started/nextjs-app-router#stream-data-alongside-response
3.1 路由
ts
import { openai } from '@ai-sdk/openai'
import { StreamingTextResponse, streamText, StreamData } from 'ai'
// Set the runtime to edge for best performance
// export const runtime = 'edge';
export async function POST(req: Request) {
const { messages } = await req.json()
const result = await streamText({
model: openai('gpt-4-turbo'),
messages
})
const data = new StreamData()
3.2 页面
tsx
'use client'

import { useChat } from 'ai/react'

export default function Chat() {
  const { messages, input, handleInputChange, handleSubmit, data } = useChat()
  return (
    <div className="flex flex-col w-full max-w-md py-24 mx-auto stretch">
       {data && <pre>{JSON.stringify(data, null, 2)}</pre>}
      {messages.map(m => (
        <div key={m.id} className="whitespace-pre-wrap">
          {m.role === 'user' ? 'User: ' : 'AI: '}
          {m.content}
        </div>
      ))}

      <form onSubmit={handleSubmit}>
        <input
          className="fixed bottom-0 w-full max-w-md p-2 mb-8 border border-gray-300 rounded shadow-xl"
          value={input}
          placeholder="Say something..."
          onChange={handleInputChange}
        />
      </form>
    </div>
  )
}