function call
4. 方式三:使用 function call 模式调用 LLM
加入你与 LLM 的交互仅仅是文本对话,那么 RSC 并不能发挥多大作用。
实际上,RSC 的价值在于,我们可以预定义界面组件,然后根据 function call 或 tool call 的返回,去调用对应的函数,然后显示多样化的组件。
假设,我们要创建一个航班助理机器人,回答用户的问题。在用户要求航班信息时,由 LLM 根据用户的提问形成调用参数。然后,我们调用相关 API 服务查询航班信息。最后以预设的界面组件回复。
如下这一示例与前述的不同是:
- 对话中,如果用户提问相关信息时,LLM 采用 function call 模式,即返回调用函数的「输入参数」;
- 有了输入参数后,AI SDK 协助完成对响应函数的调用;
- 使用自定义的预设界面组件,同样以流式输出将界面输出到页面。
用 LangSmith 进行 LLM 调用观测
在下代码示例中,为了更好地观测模型的调用,代码中接入了 LangChain 的 LangSmith 平台。
4.1 在 RSC 中配置 function call 模式
新建 lib/airsc/function_actions.tsx 如下,与之前的主要变化是加亮的部分。
这个部分指示 LLM 根据用户的对话在需要时采用 function call 模式,例如如果用户询问航班信息,则将用户对话中的航班代码解析出来。
然后,在 render 部分,我们查询航班信息,并用界面组件将之显示出来。这样,AI SDK 返回的就是一个界面组件。
注意 render 的函数是一个生成器函数(Generator function)。参考文档见:Tools and Function Calls with React Server Components
关于 Render()的说明
注意:Render() 仅支持兼容OpenAI SDK的模型/提供商。
render可用来返回 React 组件。你可以使用几种(docs):
() => ReactNode- 返回 React Node 的函数async () => ReactNode- 返回 React Node 的异步函数function* () {}- 返回 React Node 的生成器函数。async function* () {}- 返回 React Node 的异步生成器函数。
如果你使用生成器函数,你可以 yield React Nodes,它们将作为客户端的不同更新发送。这对于加载状态、代理、多步骤行为非常强大。
如果你使用生成器(generator)签名,你可以使用 yield 关键字来产生(yield)React节点,并且这些节点会被作为独立的更新发送给客户端。
在JavaScript中,生成器是一种特殊类型的函数,它可以在执行过程中暂停和恢复。yield 关键字在生成器函数中使用,用于暂停函数执行,并返回一个值。
在这里,生成器可以用于创建一个可以产生多个React节点的函数。每次调用 yield,一个新的React节点就会被发送给客户端。这对于创建加载状态或者需要多步骤的行为非常有用,因为你可以在每一步产生一个新的React节点,而不需要一次性产生所有的节点。
(说明:Vercel AI SDK 官方提供的代码示例中使用的是 tools,但各模型均未能解析得到航班代码,改用 function call 可以成功运行。)
tsx
import { OpenAI } from "openai";
import { createAI, getMutableAIState, render } from "ai/rsc";
import { z } from "zod";
import { wrapOpenAI } from "langsmith/wrappers";
import { AIStateType, UIStateType } from "./type_helper";
import { getFlightInfo } from "./mockup_helper";
import { Spinner, FlightCard } from "@/components/rscui";
// LangSmith: https://docs.smith.langchain.com/tracing/integrations/typescript
const openai = wrapOpenAI(new OpenAI({
apiKey: process.env.OPENAI_API_KEY,
}));
async function submitUserMessage(userInput: string):Promise<UIStateType> {
'use server';
const aiState = getMutableAIState<typeof AI>();
// Update the AI state with the new user message.
aiState.update([
...aiState.get(),
{
role: 'user',
content: userInput,
},
]);
// The `render()` creates a generated, streamable UI.
const ui = render({
// model: 'gpt-3.5-turbo-0125',
model: 'gpt-4-0125-preview',
provider: openai,
messages: [
{ role: 'system', content: 'You are a flight assistant' },
{ role: 'user', content: userInput }
],
// `text` is called when an AI returns a text response (as opposed to a tool call).
text: ({ content, done }) => {
// When it's the final content, mark the state as done and ready for the client to access.
if (done) {
aiState.done([
...aiState.get(),
{
role: "assistant",
content
}
]);
}
return <p>{content}</p>
},
functions: {
get_flight_info: {
description: 'Get the information for a flight',
parameters: z.object({
flightNumber: z.string().describe('the number of the flight')
}).required(),
render: async function* ({ flightNumber }) {
console.log("tools:", flightNumber)
// Show a spinner on the client while we wait for the response.
yield <Spinner/>
在如上代码中,在等待函数的输出时,我们使用了 <spinner />组件。更多可参考文档:createStreamableUI
显示航班信息,使用的是 <FlightCard flightInfo={flightInfo} />。示例代码如下:
tsx
// An example of a flight card component.
interface FlightInfo {
   flightNumber: string;
   departure: string;
   arrival: string;
}

export function FlightCard({ flightInfo }: { flightInfo: FlightInfo }) {
  return (
    <div className='border p-2 rounded-md bg-blue-50'>
      <h2>Flight Information</h2>
      <p>Flight Number: {flightInfo.flightNumber}</p>
      <p>Departure: {flightInfo.departure}</p>
      <p>Arrival: {flightInfo.arrival}</p>
    </div>
  );
}4.2 编写 RSCFuncChat, Layout, Page
- RSCFuncChat 与之前的相似,变化是调用我们新编写的
function_actions.tsx
/components/rsc-func-chat.tsx
tsx
'use client'

import { useState } from 'react';
import { useUIState, useActions } from "ai/rsc";
import type { AI } from '@/lib/airsc/function_actions';
...- 设置 layout
创建一个目录 flight,在其中加入 layout.tsx/page.tsx。
/app/flight/layout.tsx
tsx
import { AI } from "@/lib/airsc/function_actions";

export default function Layout({
  children,
}: Readonly<{
  children: React.ReactNode;
}>) {
  return (
        <AI>
          {children}
        </AI>
  );
}- 在页面中对话显示
/app/flight/page.tsx
tsx
import  RSCFuncChat  from '@/components/rsc-func-chat';

export const runtime = 'edge';

export default function Page() {
  return <RSCFuncChat />;
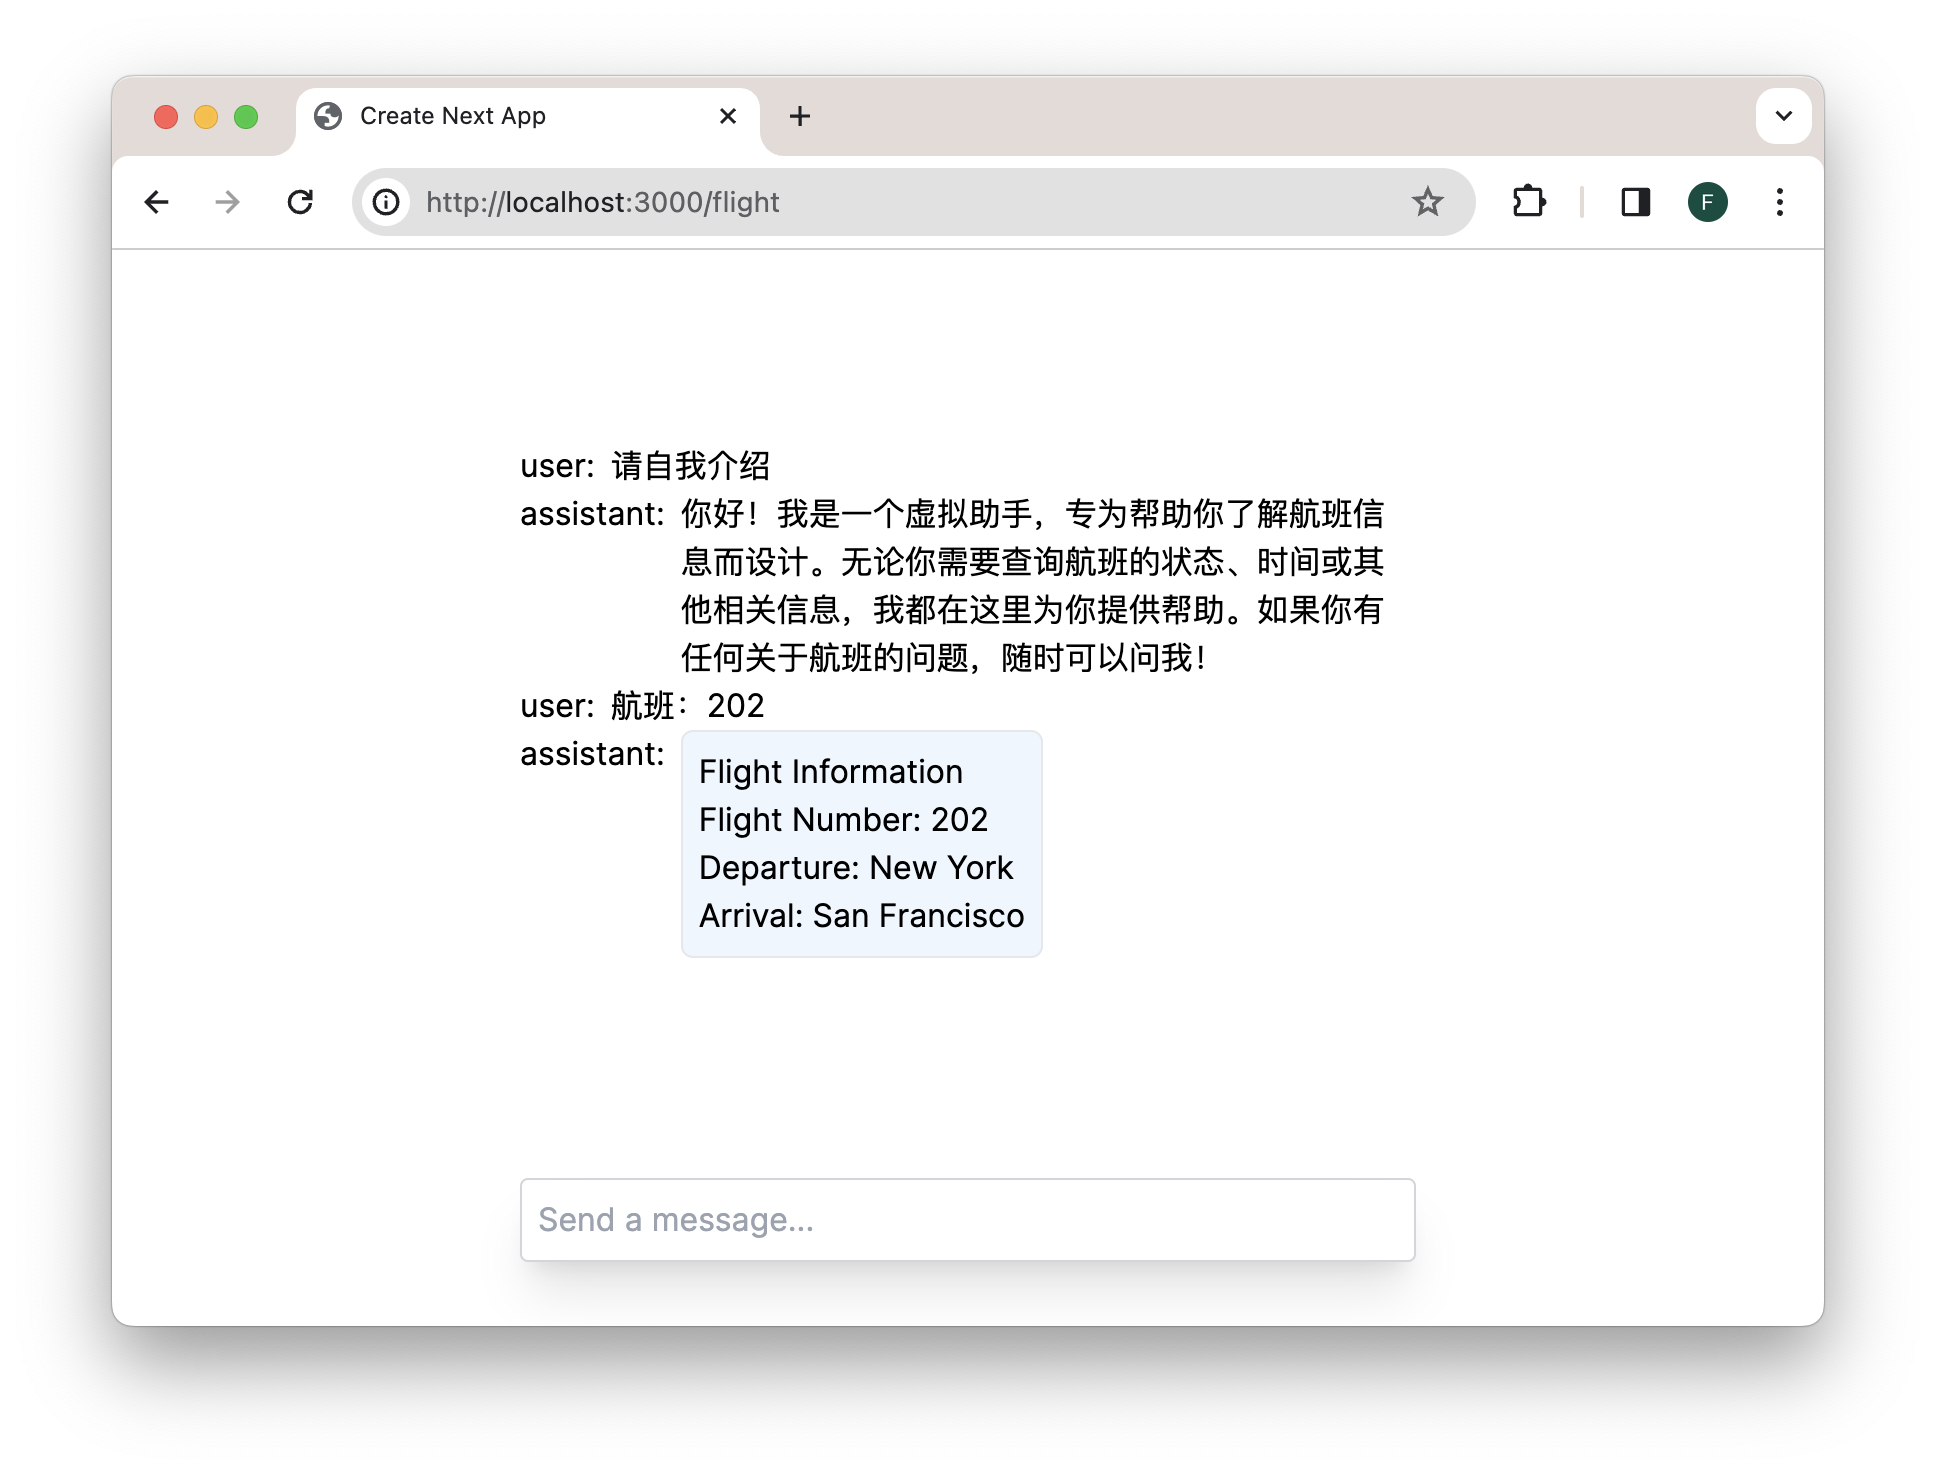
}对话的界面效果如下:

4.3 使用 LangSmith 观测
为了能观测 LLM 的运行,我们使用了 LangSmith。在 smith.langchain.com ,我们注册获得 API KEY,并相应地修改 env.local:
OPENAI_API_KEY=xxxxxxxxxx
LANGCHAIN_TRACING_V2=true
LANGCHAIN_API_KEY=xxxxxxxxxx在调用 LLM 时,我们使用了 LangSmith 提供的 OpenAI 集成方式,文档可参看:[langsmith OpenAI integration] (https://docs.smith.langchain.com/tracing/integrations/typescript)。代码如下:
tsx
const openai = wrapOpenAI(new OpenAI({
  apiKey: process.env.OPENAI_API_KEY,
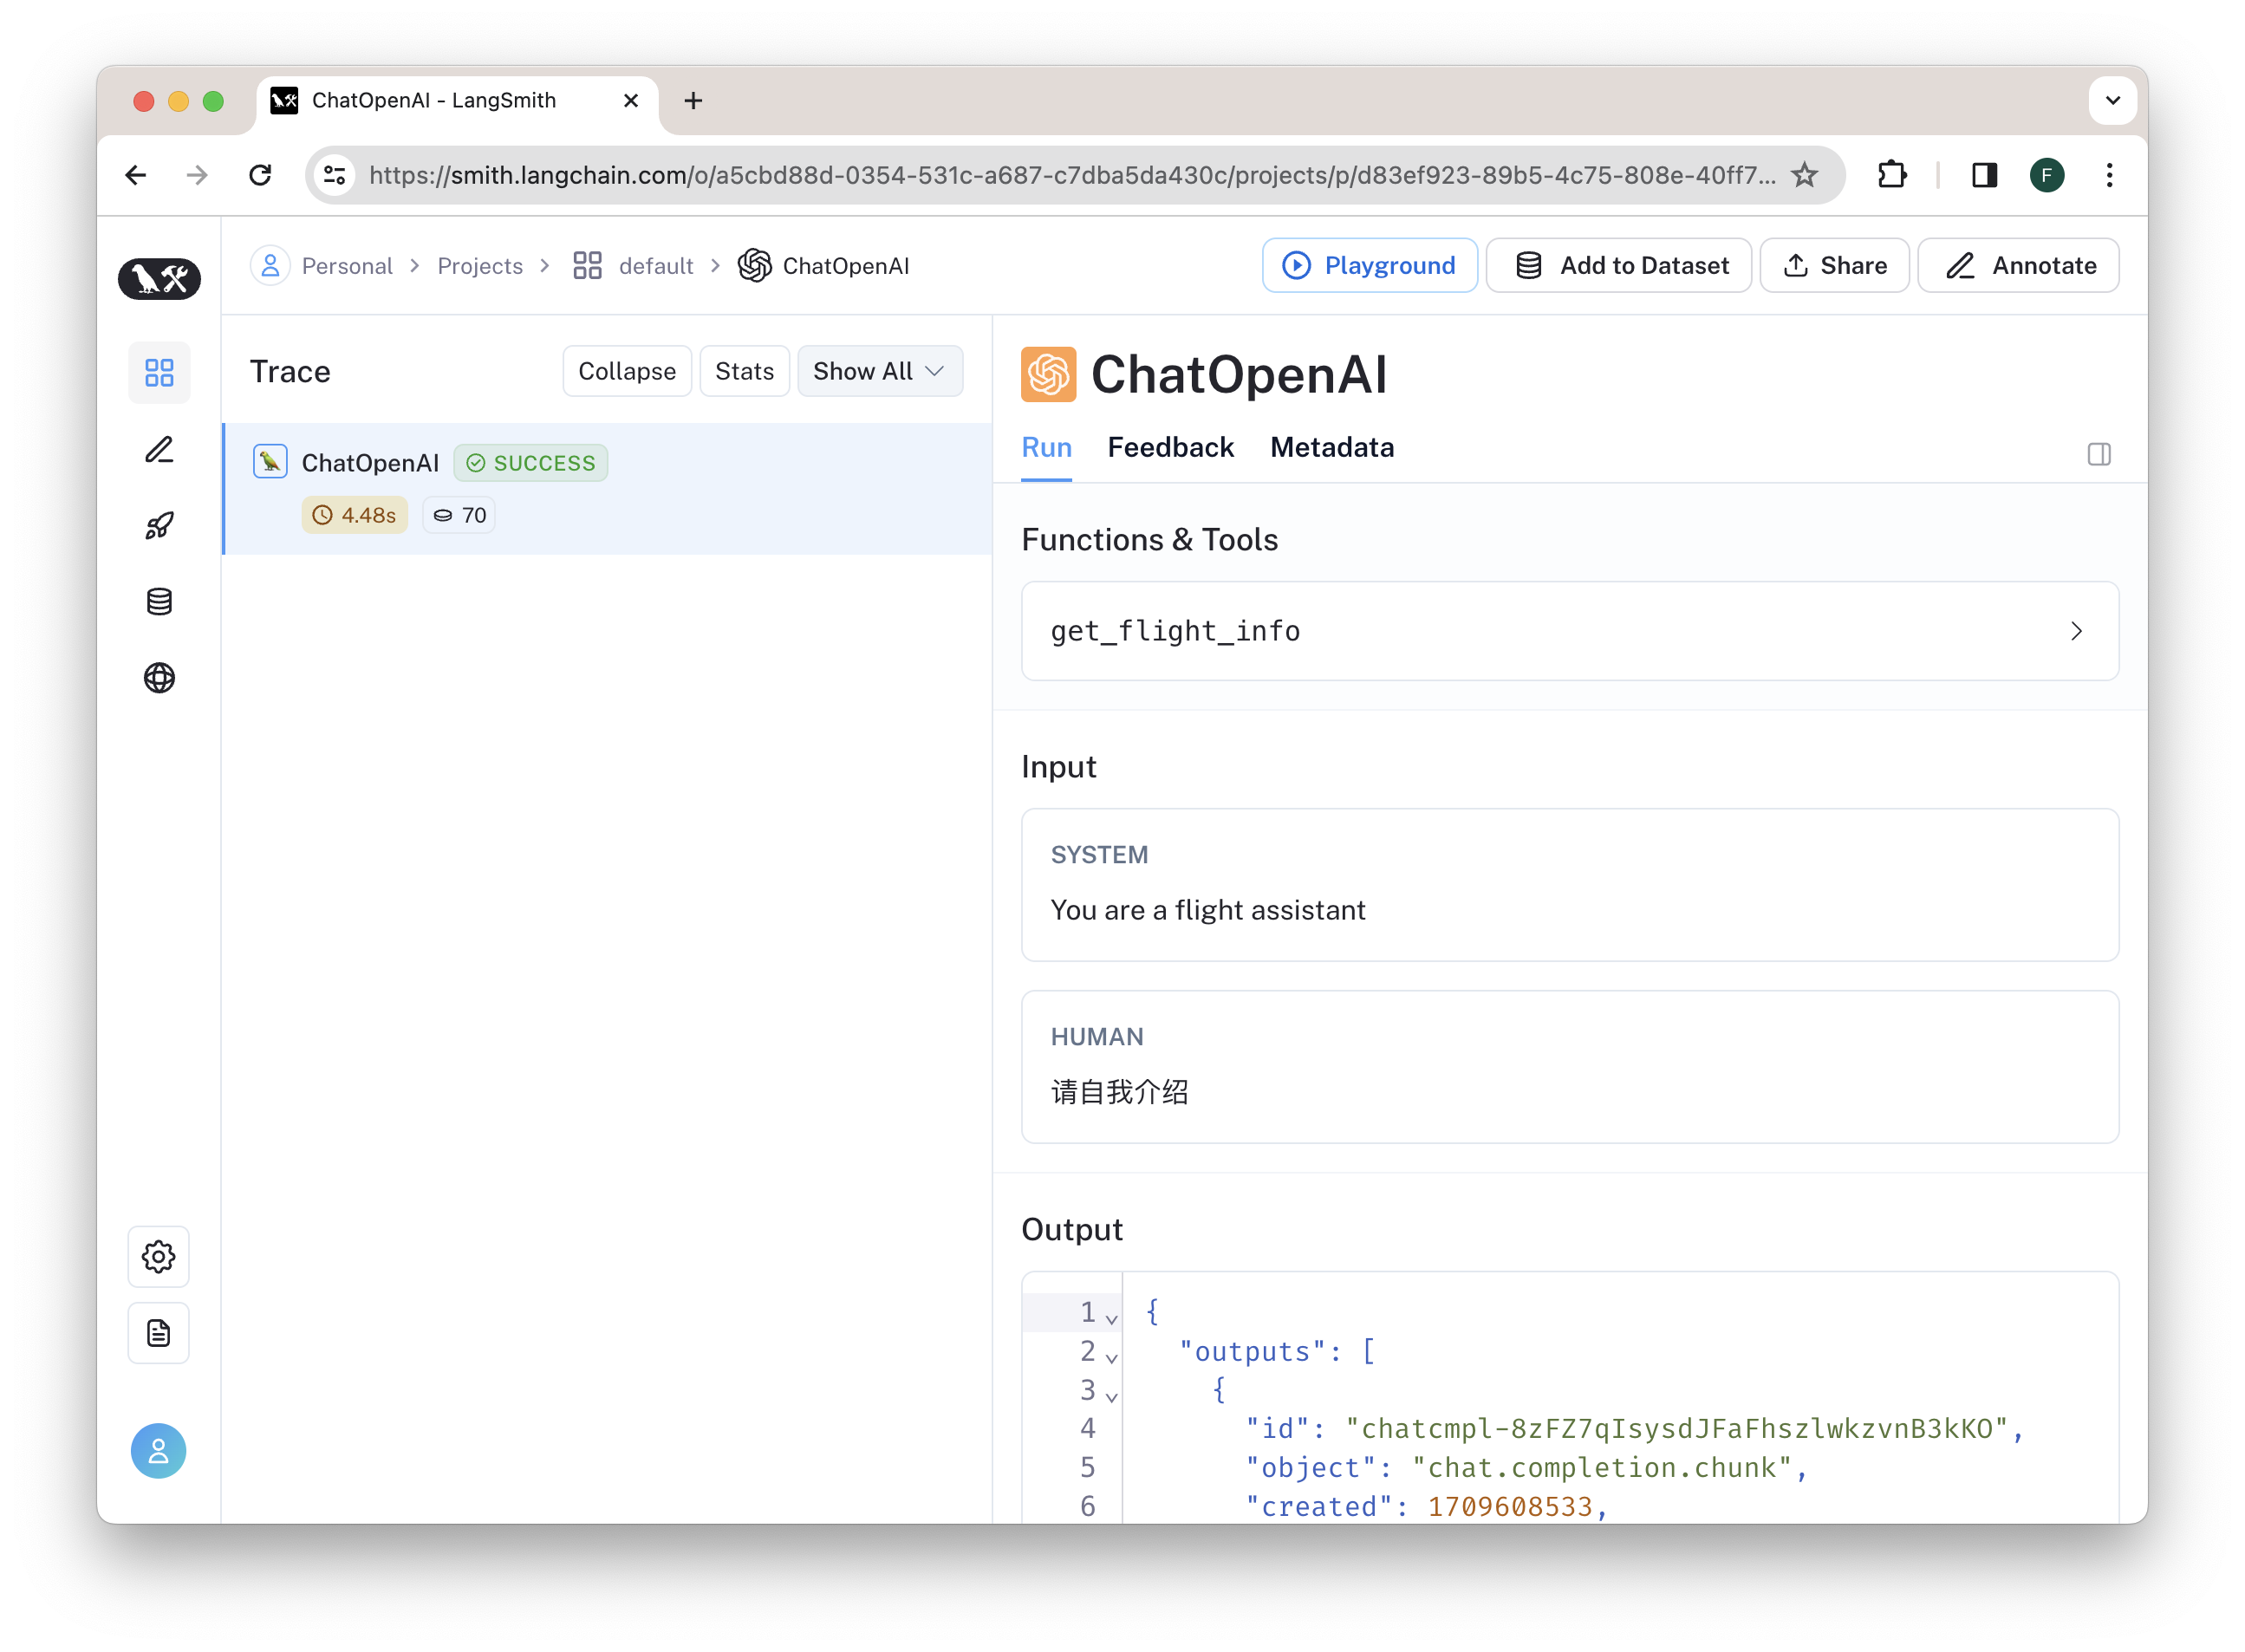
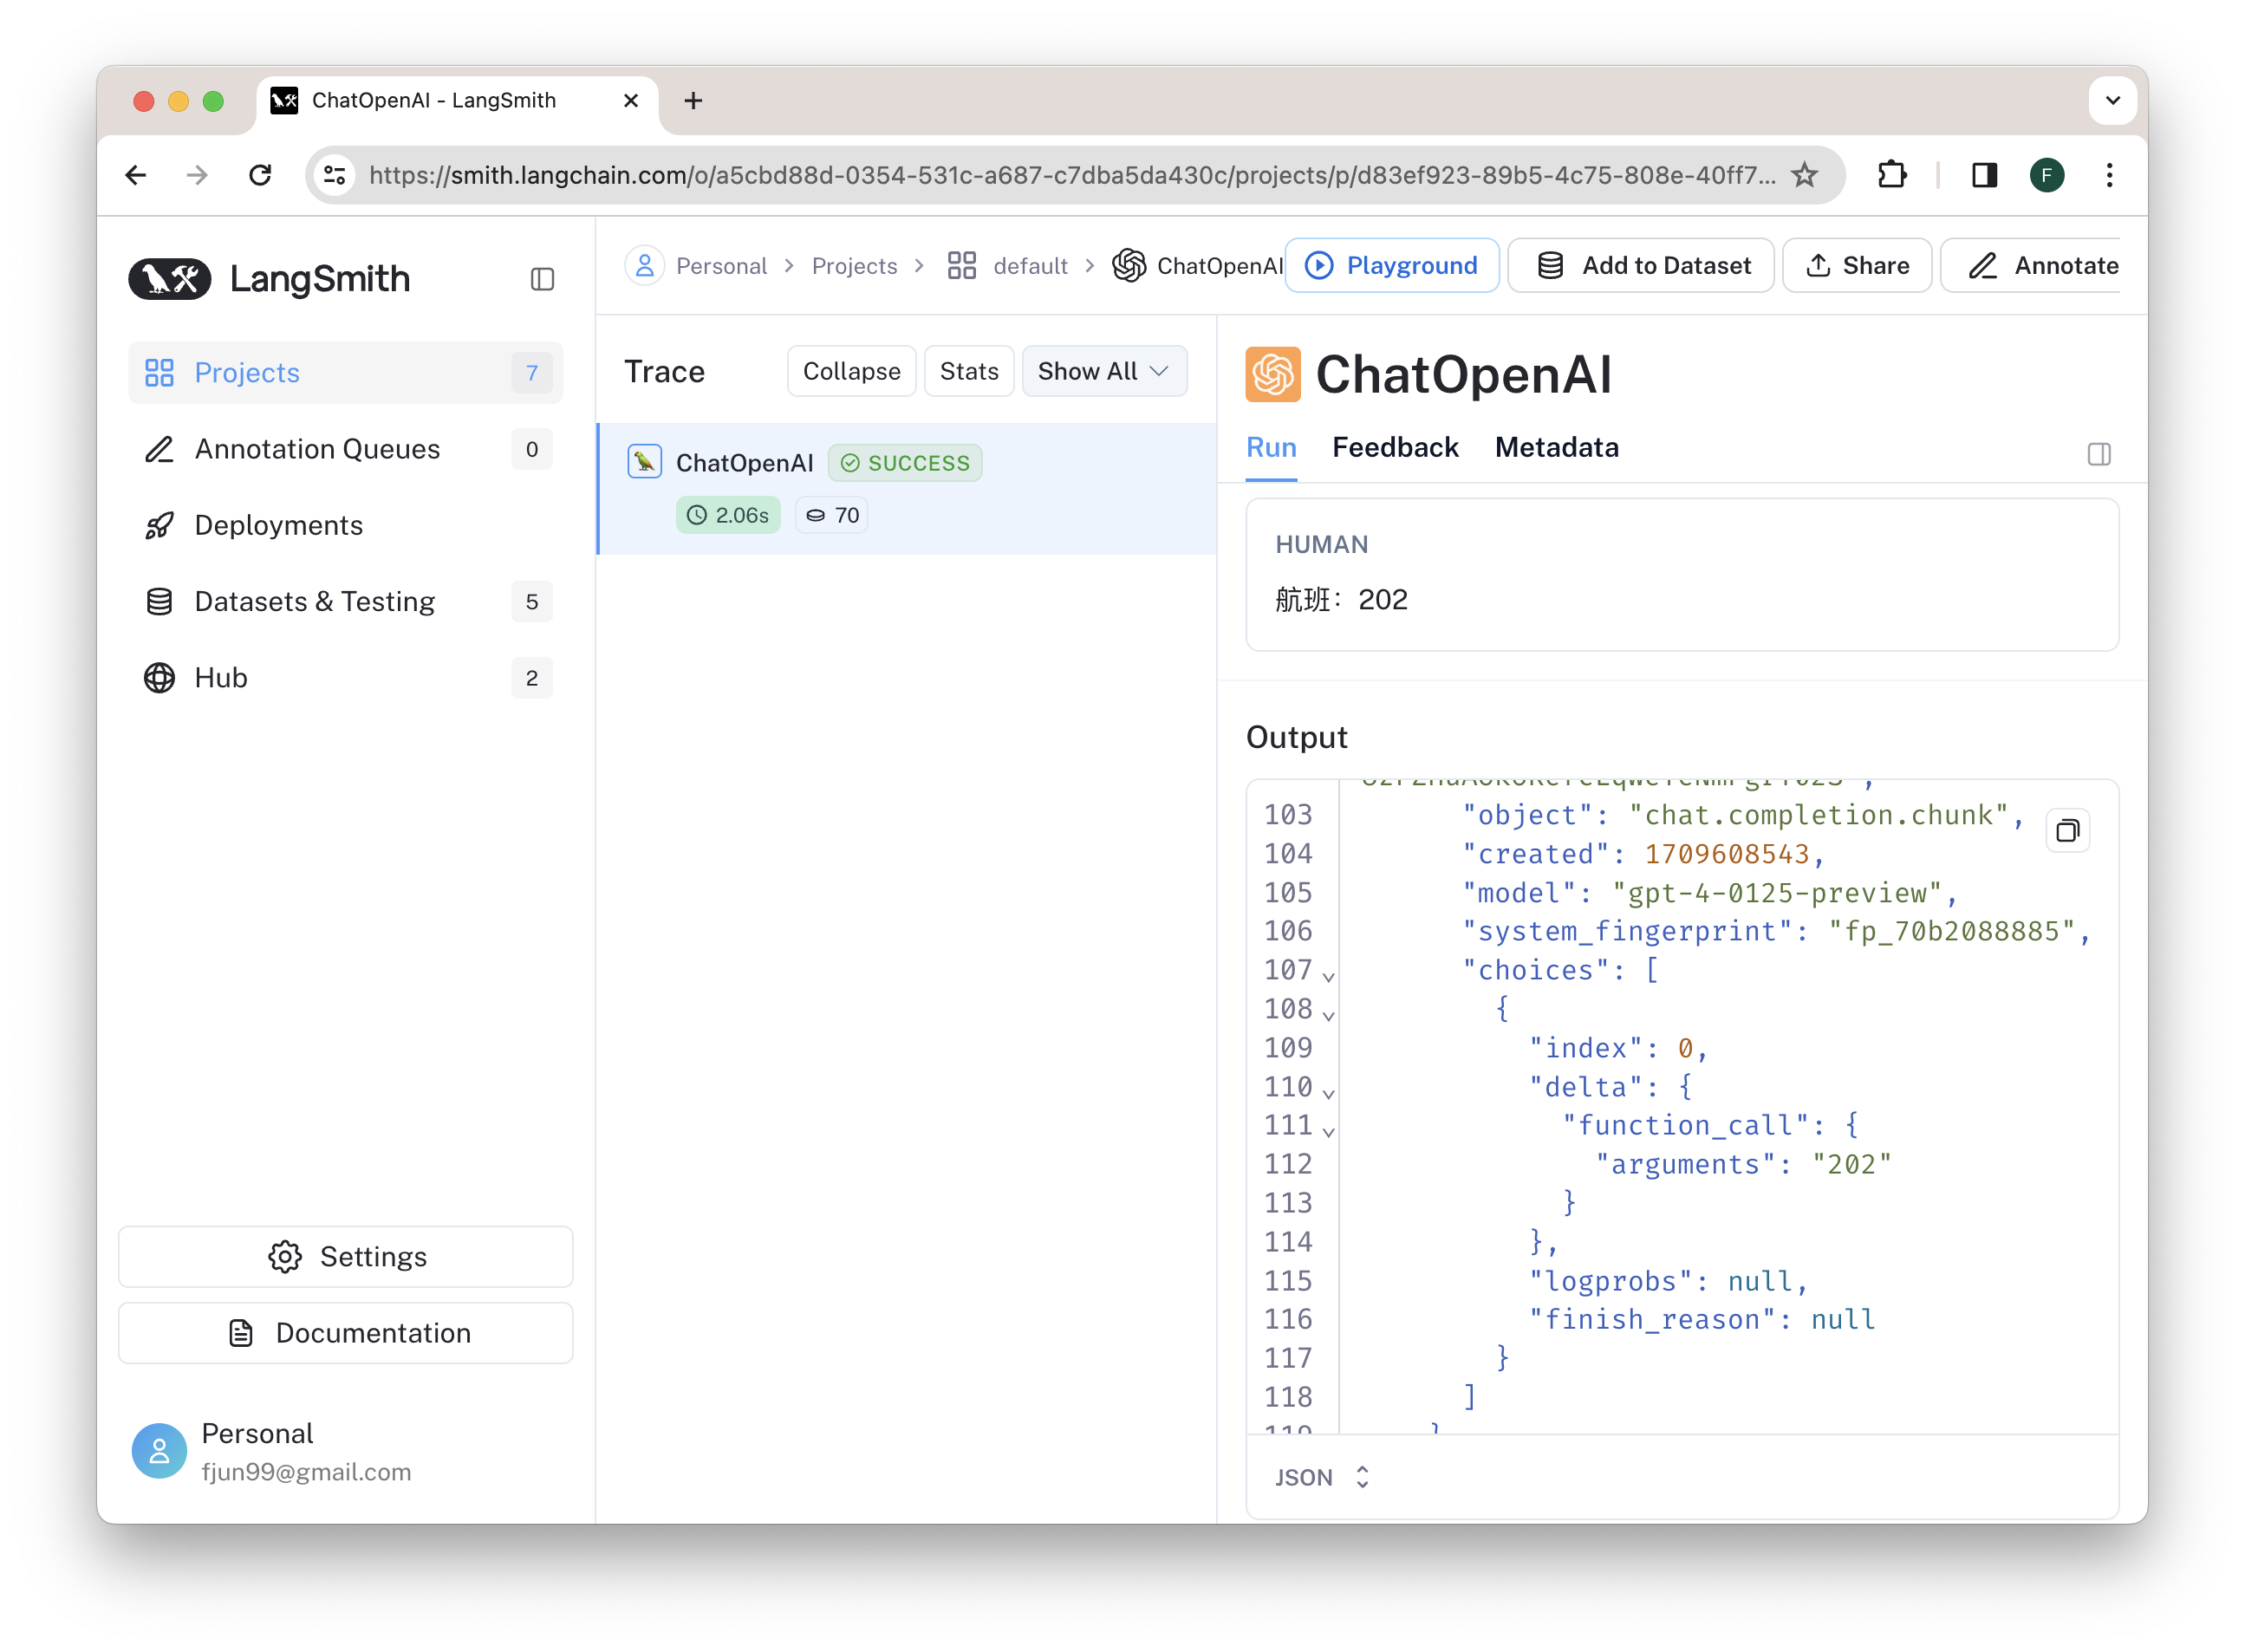
}));我们进行的两次调用在 LangSmith 平台就可以看到具体的调用细节。
第一轮对话为常规对话

第二轮对话为函数调用

5. 小结
通过如上介绍与实力,你应该已经了解了 Vercel AI SDK 的调用方式,特别是采用了 RSC 之后的流式界面组件使用。之后,你可以接着根据文档继续探索与运用它。
资料来源:
